

It is customary to organise the CDP programs and related files in a number of directories (folders) on the hard disk. On the PC, the CDP programs and documentation are installed within a base folder such as \cdpr8, which may be on any drive, typically drive C. On the MAC, they are placed in the home directory, also in the folder cdpr8.
Many users place their software on Drive C, while their other files and personal work area are placed on another drive. Even if you have only one hard drive partition, Drive C, you should still put your own files (particularly soundfiles in a different folder from the CDP programs.
On the PC, the CDP programs are designed for use with Windows 32-bit systems from Windows 2000 and later (including XP, VISTA, 7, 8, 8.1, 10 and 11). A Windows 64-bit system can also run the CDP 32-bit programs. (Ignore any messages from the Compatibility Checker.)
CDP can be run from a Graphical User Interface (GUI) program, such as SoundLoom or Soundshaper (PC only), or via the Command-Line Interface (known as 'Terminal' on the MAC).
Return
to CDP Main Index
Return to top
From the CDP downloads page, choose what to download:
SOFTWARE PC:
From the downloaded zip file, extract cdpr800-InstallPC.exe and double-click on this file to begin the installation. The CDP files are preset to extract to the folder cdpr8. You should put a drive letter in front of this: e.g., C:\cdpr8. (Any valid drive that is on your system will do.) This is the base CDP folder, created during extraction, and several subfolders are created within it.
Do not install CDP in the \Program Files folder. This is because the command-line environment used by CDP is fussy about spaces in a folder name.
The following is the standard directory (folder) setup for the CDP system:
\cdpr8
\Al-Erwin (if installed)
An important hybrid mixing and granular synthesis programs by Rajmil Fischman, which should be extracted here.
Download AL&Erwin.zip from here , extract and double-click on the setup file AL&Erwin103.exe to install it.\_cdp
Soundloom.exe (if installed), and possibly an older backup copy
\_cdprogs
The folder containing the CDP programs.For SoundLoom only:
\_cdpatch and other sub-folders
The other folders within _cdp relate to the SoundLoom GUI, which is also included in the folder.
To run SoundLoom, double-click on soundloom.exe. A desktop shortcut is recommended.\docs
The folder containing the offline CDP documentation. Download this from the CDP downloads page.
The Home Page and the Main Index Page link to all the documents and tutorials. A desktop shortcut to the Main Index index.html, at the top level in \docs, is recommended.
The \docs folder contains sub-folders, including \html and \htmltuts. The sub-folder \Specialhelp contains a number of help files relating to SoundLoom.
The documentation is also available online.\Soundshaper6 (if installed)
The Soundshaper GUI is normally extracted here.
Soundshaper is downloaded from the CDP downloads page and installed via a self-extracting zip file. You will be asked for the CDP base folder (e.g., C:\cdpr8). A desktop shortcut to Soundshaper.exe is recommended.
In Windows' Control Panel, you will need to set Environment Variables, which are default values used by CDP, whether it is run from a Graphical User Interface (GUI) or the Command Line. Soundshaper sets these for you according to its program settings, but it is recommended also to set them at the PC System level.
Windows 10 and 11:

Pre Windows 10:
The 'buffer' here means temporary storage space used during the operation of a program. Some programs require a great deal of buffer space and may complain that there isn't enough.
In the UPPER pane of Environment Variables , enter as NEW the variable name CDP_MEMORY_BBSIZE and the value 1024.
This value may need to be expanded if performing certain operations, such as FILTER ITERATE on very large soundfiles.
In Soundshaper, it can be set and adjusted under Settings. If using SoundLoom, you will need to set it
here, under the Control Panel Advanced settings.
For command-line use, you can also set an environment variable so that you can use a specific named soundfile as a temporary file which can be overwritten.
The idea is that you can try out a program with various parameter changes without having to change the name each time, and without creating lots of different soundfiles. When you find one you want to keep, you just rename it or make a copy of it. The disadvantage of this is that you can't compare the results with a previous version, and if you have not noted what the previous parameters were, you may never be able to reconstruct the former version.
This option does not apply to to Soundshaper, which outputs temporary files in any case and erases these when they are altered.
The environment variable is CDP_OVERWRITE_FILE and its value is the name of your proposed file, e.g., test.wav. The extension (.wav) here appears to be mandatory, even if it is not used in the command line or in a batch file.
Installation Notes for the MAC are downloaded from the CDP Downloads Page: InstallationDocumentsPC-MAC.zip and are also found within this documentation (see links below).
MAC users should follow the detailed document CDP-InstallationNotesMAC. The distribution installs the core CDP files in the folder cdpr8 in the user's home directory.
There is also a document for manual configuration of CDP from the command line, for users of Mac OS X 10.8 (Mountain Lion) and later: Manualconfig-MAC.pdf. .
The MAC directory structure is similar to that for the PC, except that the top level cdpr8 is installed inside your home directory, i.e. ~cdpr8 (where the tilde character is standard Unix shorthand for your home directory), and directory levels are separated by the / character, instead of \, as on the PC.
The structure is described in detail in the document CDP-Check_Installation-MAC, also supplied within InstallationDocumentsPC-MAC.zip.
Return
to CDP Main Index
Return to top
The CDP System is designed mainly for sound transformation, although it also has a small but growing number of synthesis functions. The emphasis is on the design of sounds, either for electroacoustic music composition or sound clips or tracks in songs or other media. Many people use CDP alongside other software in a hybrid studio environment.
CDP is a non-realtime system. It does not process an audio stream, but generally takes a pre-existing file, such as a 'sampled' soundfile, and produces another file as output. Processing is normally non-destructive: CDP will always create a new file, rather than over-write an existing one. However, in many cases, it can operate faster then realtime and accomplish complex processing in just a few seconds.
You can operate the CDP software via a graphic user interface (GUI) or via a Command line interface (CLI), depending on preference and the particular task in hand. The reference documentation describes the CDP command line(s) for each process, as these must also be written by any GUI. Command line use is greatly extended by writing batch scripts (PC) or the equivalent shell scripts (MAC/Linux).
Roughly half of CDP processes transform soundfiles, which can be of type .wav or .aif. It is now possible to use just the .wav format on both PC and MAC. Many sub-types of .wav files are supported and you can convert between them using COPYSFX, whose documentation lists the various supported types. Ambisonic B-Format files (.amb) are also supported. Sometimes an imported soundfile made by other software does not work with CDP, due to differences in the header contents. This is usually resolved with COPYSFX:
copysfx importedsfile.wav cdpcopy.wav
– the new copy should be CDP-compatible.
Soundfile processing is in the Time Domain. A time domain display of the sound shows samples: time units and amplitude levels at that time point. The graphic display shows time on the horizontal axis and amplitude on the vertical axis, positive values above the zero line (speaker cone moving forwards) and negative below (speaker cone moving towards the back). This type of information and display is used for processing soundfiles. The image below shows a time domain signal display:
Apart from filtering, soundfile processes do not generally alter the fundamental timbre (tone-colour), but affect the evolution of the sound in time, for example by altering its loudness curve (ENVELOPE functions), changing its speed (MODIFY SPEED), extending it (EXTEND functions) by reading the file in unusual ways (e.g. ZIGZAG), echoing (e.g. EXTEND ITERATE) or otherwise repeating the whole file or sections of it (see especially TEXTURE), or layering segments to create thick grainy textures (MODIFY BRASSAGE). Spatial effects are prominent too, since the development of multi-channel techniques.
CDP also has a large suite of spectral processes in the Frequency Domain, operating directly on frequency information. The input and output files here are frequency analysis files (.ana), which are converted to and from soundfiles by the Phase Vocoder program PVOC.
A frequency domain (FFT) display shows partials (frequencies) and their amplitude levels:
Partials are harmonic if they are integer multiples of a fundamental frequency. The partials are bound together, as it were, into what is perceived as a single pitch. Inharmonic partials are fractional (or decimal) multiples of the fundamental and can be perceived more individually, for example like the different tones in a bell or a gong. The makeup of the partials in a sound and how they alter in loudness over time determines the timbre of a sound.
In the image above (an analysis of an organ note), the most prominent spectral peaks show the first 12 harmonics of the sound. Above a frequency of about 4KHz, the peaks are indistinct, or randomly spaced, indicating the presence of noise. The image shows a single spectrum – either a snapshot in time or an average over time; in most sounds, the spectral content evolves throughout the lifetime of the sound.
Spectral processes often alter the frequency content, such as transposing it without altering time (REPITCH TRANSPOSE), shifting it (STRANGE SHIFT), re-tuning it (PITCH TUNE), or filtering out unwanted frequencies (HILITE FILTER, HILITE TRACE).
However, many others manipulate aspects of the spectral envelope – the overall evolution of the spectrum over time. Examples include sustaining frequency bands (FOCUS ACCU), freezing the sound (FOCUS FREEZE), blurring by time-averaging the spectrum (BLUR BLUR) and shuffling analysis time-windows (BLUR SHUFFLE). The spectral envelope can itself be extracted as a formant file (.for), and combined with pitch information to create interesting hybrids.
One offshoot of frequency analysis is the extraction of pitch (in a pitched sound) as a separate file (.frq). Various processes manipulate this information before re-combining it with a formant file to re-create sound (see REPITCH). Another possibility is to re-combine the pitch trace file (.frq) with a pitch transposition file (.trn) made with REPITCH COMBINE or REPITCH COMBINEB: see the 'Repitch Inputs & Outputs' Chart.
Two key concepts when dealing with spectral processes are Analysis Bands and Analysis Windows.
When a frequency analysis is made, the Fast-Fourier Transform (FFT) which is used converts from amplitude/time to amplitude/frequency. It does this by stepping through the source sound using a series of tiny time windows, each containing a single spectrum, and ascertaining what frequencies are present and how loud they are. This is done by dividing the frequency range into a number of bands and 'looking' in each band. These are the analysis bands, and the narrower they are, the less likely they are to have several important frequency components ('partials'). There is a trade-off to be made between band width and window-length: when more samples are used at once, the frequency resolution is better, but a larger unit of time is used, meaning a loss of time-varying data.
The PVOC analysis default values work well enough for most purposes and you can use the SPECINFO functions to find information you might need to set spectral parameter values for CHANNELS and WINDOWS.
For a more technical discussion, see the Technical Glossary, especially the articles on ANALYSIS SETTINGS and WINDOW, and The Operation of the Phase Vocoder.
Apart from the Infile and Outfile, for most CDP processes you have to set parameter values. Parameters are the controls you have over a process, corresponding to the physical dials or faders on a piece of audio hardware. On the command line, you have to type in these values, in the correct order. In a GUI, there are sliders or dials to help you set something more quickly and in any order. The image below comes from Soundshaper (process: FILTER SWEEP).
Notice that most values are numerical and that a value range is given. (You are not obliged to keep within the range, but risk a CDP Error if you are not clear about the actual range for the process.)
TIme-varying values are very common in CDP. To achieve this, the single value is replaced by a text file containing a series of time value pairs. This type of textfile is known as a breakpoint file and typically has the file extension .brk (though .txt is also permitted). In the FILTER SWEEP example, all the parameters shown can be time-varying (indicated by the 'T-V' checkbox) and in the screenshot the first has been replaced by a textfile.
In a breakpoint file, time is normally given in seconds, down to a resolution of six decimal places. There is a CDP convention that time must increase from one line to the next (even if by a minute amount). There is a further convention that where the next breakpoint value is different, the software linearly interpolates intermediate values between the user-specified values at different times, creating a ramp between the two values. To maintain a steady value, give two adjacent time-points the same value.
Some parameters are required to be textfiles, and there is a large variety of these. A key document outlining them all, with examples, is CDP Files and Codes, accessible from all reference documentation pages.
Optional parameters: many parameters are optional; in the reference documentation, these are shown within square brackets, such as [-ddelay]. Most are preceded by a flag – here, the text -d. (In a GUI, the flag will be inserted for you.)
Other optional flags: other options – to be included or not, as you wish – use a stand-alone flag (e.g. -d). (Again, a GUI should place this for you, if selected.)
Random values: in some processes, notably those in the TEXTURE suite and the granular program SAUSAGE, the value is decided randomly between lower and upper limits set by the user.
Return
to CDP Main Index
Return to top
Amplitude refers to the loudness of a sound. Gain is the degree of change to amplitude, and can be expressed as a linear amplitude change or as a dB (decibel) change. A Gain Factor of 0.5 (i.e., where every sample value is multiplied by 0.5) corresponds to a change of -6dB. The CDP software uses mostly a 0 to 1 numerical range, or sometimes a decibel range. In the numerical range, the value 1.0 defines the peak level, while 0.0 signifies silence. In decibels, this range is 0dB (full amplitude) down to -96dB (silence). With 24bit or 32bit audio, dB values can be even lower than -96dB. CDP provides a Gain-dB chart to assist in relating these two scales.
Excessive use of gain can result in digital noise, and distortion can occur when the signal level rises above the peak level (>1.0). This can happen very easily when mixing soundfiles, as the amplitudes are summed.
The changing amplitude of a sound over time is known as its Envelope. CDP has a large range of envelope-shaping functions as well as well as several which make use of the amplitude peaks in a sound.
The Attack Transient is the rate and amount of amplitude increase at the start of the sound – both a natural physical characteristic of many sounds and an important musical gesture. Often it is only from the attack that we recognise what is making the sound. It also affects what we perceive as the timbre or tone colour of the sound. Decay is how the sound ends, the rate at which the sound returns to silence.
Sample rate is the number of samples per second with which the physical sound is represented. CD quality is 44100 samples per second. For the highest quality "pro-audio" production, higher sample rates are in common use, such as 96000. In the CDP software, output soundfiles are given the same sample rate as the input soundfile, whatever it is. There is also software (COPYSFX) to change the sample rate of a soundfile. Rates less than 44100 are not recommended.
Zero crossings occur when the waveform crosses the zero line, that is, has no amplitude. This may happen at regular or irregular time intervals depending on the complexity of the waveform. CDP refers to portions of the signal spanning two zero-crossings as wavesets or 'pseudo-wavecycles', and they are used as the basis of the DISTORT programs. Editing a soundfile at zero-crossings ensures that there will not be a click at the start of the cut portion of sound.
Return
to CDP Main Index
Return to top
CDP programs can be run from a Graphic Interface (GUI) or a Command Line Interface, known as the Command Prompt (PC) or the Terminal (MAC / Linux). All CDP processes and functions are invoked via a command line – even the graphic interfaces construct and run command lines behind the scenes. (See Command Line below for more on the structure of a typical CDP command.) The main CDP reference sections document the command-line usage for each program.
The command-line environment enables you to access CDP at the lowest level, for example to run system functions such as DIRSF or COPYSFX, to create shell scripts (MAC) or batch files (PC) which can be used to run several processes at once, or to control CDP programs in a more algorithmic way via a scripting language.
This section is mainly concerned with the PC command program CMD.exe, although most of the concepts also apply to Unix systems. For specific advice on running CDP commands on the MAC, see Using Terminal.
In a command-line environment, one folder (directory) is chosen as the current working directory (a kind of "you are here"). This is given in the displayed command prompt, for example:
E:\cdpr8\TEMP>
In recent versions of Windows (8 onwards), you can open a folder in Explorer and click File | Open Command Prompt: the current directory will then be that folder. In earlier versions, such as XP and Windows 7, the command window may open in (for example) a subfolder of C:\Documents and Settings\ or C:\Users, and you must change the directory to your desired folder using the cd (change directory) command. A simpler workaround is to place a copy of CMD.exe in your normal working folder, if you have one, and make a shortcut to this.
The current directory is where CDP looks by default for its input file(s) and places any output file. You can specify a file by its name alone (e.g. mysound.wav or transpose.brk). If you want to specify a file in a different folder, you must prefix the full path (e.g. E:\CDP\SNDS\mysound.wav). (For soundfiles, the suffix .wav may be omitted if you have set this as the default soundfile extension: see Setting the soundfile extension).
The computer has to be able to find the CDP program you specify. This will not normally be in your working folder, so you must specify the search path. This can be done by typing PATH followed by the CDP program folder, for example:
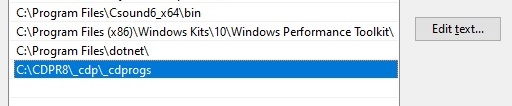
PATH C:\cdpr8\_cdp\_cdprogs\
Once the system knows the path, you can then run a series of CDP commands. It is better, however, to add the CDP program path at the system level, as described above in Setting the Path, so that your computer can always find CDP programs. You will then not need to add a PATH command. (Note that the Path mechanism enables the computer to find only programs, not any other type of file.)
The CDP Reference documentation gives the Usage Statement for each program, or you can type just the program name at the command prompt.
A typical CDP command line has the following structure:
program_name infile(s) outfile parameters [flags]
The Infile (input file) and the Outfile (output file) are normally the names of soundfiles or frequency-analysis files (.ana).
An example of a usage statement followed by a possible command line for the program:
grain repitch mode infile     outfile    transpfile  [-blen] [-lgate] [-hminhole] [-twinsize] [-x]

grain repitch 1    grnsnd.wav grnpch.wav pchlist.txt -b1.2  -x
For further information on CDP command lines, see the Technical Glossary.
If a command line has been wrongly constructed, or the CDP program cannot run the command for any reason, an Error Message will be shown. The most common causes are invalid parameter values or inability to write to the output file.
There are also Warning Messages and general advice, particularly for Information functions.
Users new to the command line environment may find the following basic procedures helpful:
soundinfo props mysound >sndinfo.txt
erase *.wav
You can read more about the Windows command line environment in a separate document: The Windows Command Prompt. This is a basic introduction, explaining directories and paths, how to change and create directories, set a path etc.
For a comprehensive description of all CMD (Windows PC) and BASH/OS X (Linux / MAC) commands, see the website ss64.com.
Once a separate utility, DOSKEY is a facility built into CMD.exe (although there is still a DOSKEY command to change its operation). Holding down the function key F1 recalls the last-used command line character by character; hence you can alter some of the content as you go. This is useful if you need to re-run a command with slight variations. You can also scroll up and down the command window using up/down arrow keys to see the whole command sequence.
Although the standard controls for COPY and PASTE are not available in the Command Window, equivalents are available in the Edit Menu (below the CMD icon): select MARK and then drag the mouse to highlight the required text, followed by RETURN to COPY it; then reposition the cursor and select PASTE as required.
Batch scripts contain one or more CDP command lines and/or general system commands, saved as a batch file. A batch file is a text file with the extension .bat. The Unix equivalent (with a similar syntax) is a shell script, suffix .sh.
To run the batch file, enter the name of the file, optionally preceded by call. You may also omit the suffix .bat. If you do, be careful not to give the batch file the same name as a CDP program or a CMD reserved word.
Batch files can speed up the use of the CDP system in a command line environment considerably. For example, if you are running a program over and over, changing the parameters a little each time in an effort to get just the right sound, putting the command line into a batch file could be useful, especially if you want to try a number of options all at once and then compare the aural results. It is also useful when working with spectral processes, where analysis and re-synthesis with PVOC are included in the batch file. Batch files also provide a record of the final versions of the command line(s) used to create a certain sound.
Here are some examples:
1. Complicated command line: a long command line contained in a batch file can be edited in a text editor.
Name: sauce.bat
Contents of file:
modify sausage insound sausout 0.2 1.2 gsize.brk pshift.brk space.brk
(insound.wav and sausout.wav are the Infile and Outfile respectively.)
To run the file, enter: sauce. The batch file runs SAUSAGE with the flags and parameters you've specified.
2. Varied parameter values: several outputs, each with a different number of retained channels.
Name: traces.bat
Contents of file:
pvoc anal 1 insound insound.anaTo run the file, enter: traces.
hilite trace 1 insound.ana outsnd1.ana 20
hilite trace 1 insound.ana outsnd2.ana 10
hilite trace 1 insound.ana outsnd3.ana 5
pvoc synth outsnd1.ana outsnd1
pvoc synth outsnd2.ana outsnd2
pvoc synth outsnd3.ana outsnd3
3. Use of parameters: a parameter value is passed to the script when run.
It can be very useful to pass a parameter, especially the name of a file, to the script. Batch scripts refer to the parameters using the tokens %1 to %9. The first item passed is always %1, the second item is always %2, and so on. The scripts use simple substitution of the text passed.Name: p.bat
Contents of file:
paplay -i %1.wav %2 %3To run the file, enter, for example: p mysound 0 2. %1 is the file to be played, less the extension .wav, which is added in the script; %2 is the from parameter value; %3 is the to value. (The -i flag means "play immediately".)
On another occasion, you might enter p outsnd 0.5 ; the script cannot use the "to" value, because it isn't there, and it can be omitted in the PAPLAY command, causing the sound to play to the end.
4. Nested batch files: one batch file calls another.
sauce.bat is expanded to play the outfile if it has been created.
Parameters %1 and %2 are the infile and outfile, respectively.
Name: sauce.bat
Contents of file:
  	  modify sausage %1 %2 0.2 1.2 gsize.brk pshift.brk space.brk

	  if exist %2.wav p %2
To run the file, enter, for example: sauce insound sausout.
While Batch files enable a specific sequence of CDP commands to be tested and run in one go, there are some limitations which affect more general use:
![[soundwave]](../images/SNDWAVE.jpg)
![[spectrum]](../images/SPECTR1.jpg)
![[parameters]](../images/PARAMS.jpg)